Why the right way is the best way
The Small Farms princess of the hotplate — Lynn Bain — is prepared to stake her reputation on her very simple, even classic, approach to cooking a steak. If you follow it through you might not just end up with the perfect meal, it should also present as a little work of culinary art
THERE are many ways to cook a steak; try not to get too ‘wrapped around the axles’ as to which is the better way.
During the butchering process, steaks are cut and presented, so it is difficult to wreck them.
But notwithstanding that promise of the foolproof feed, the following technique works and has a little showmanship to it.
This is the double salting method.
The salt can be rubbed into each side of the steak about 40 minutes before cooking; then more salt is applied just before cooking (you can do this to one of the sides of the steak while it is in the pan).
If you prefer to minimise the amount of salt, may I suggest salting only one side (still approximately 40 minutes before cooking).
Cook/sear the salted first and then salt the second side when it is facing upwards in the pan while the first side sears.
Ingredients
Steak
Sea salt (either salt flakes or ground salt)
It is better if your steak is at room temperature.
A dry surface assists you to get a good sear on your steak.
Achieve this by letting the steak sit in the open air, under a mesh food cover, on your kitchen bench. An alternative is to sit the steak uncovered on a rack in the fridge for a day or overnight — either way, sear generates great taste.
Method
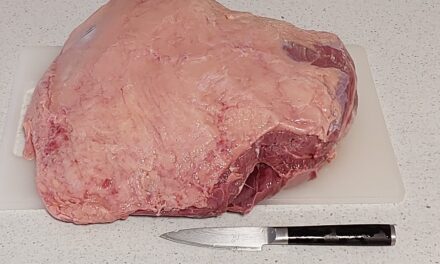
Rub the salt into the steak with clean fingers (best tool) about 40 minutes before grilling. Apparently the salt dissolves into a brine that is absorbed into the surface of the meat via osmosis. Then the meat juices in the meat mix with the marinade (if used) and the salt. This enhances the delicious meat flavour.
Salt rubbed steak. Steve salts the steak on one side only at this stage as he does not wish the salt taste to overpower the steak. Others (me) may not be so salt sensitive (my husband Steve grew up not using salt — he dislikes the taste, yet fortunately loves the meat’s natural flavour that is enhanced by a small amount of salt).
Either oil the pan, or my preference which is to spray the grill pan with canola oil. Others will say to oil the steak; either way will work, as long as you get some neutral flavoured high-flash point oil into the process. This way is my preference.
Spray the grill pan with non-stick canola oil. I use a round grill pan when cooking on a round hot plate. I don’t think a square grill pan really allows me to fit in more food because the corners on the pan don’t heat up as much as the centre when it’s used on the stove top (btw, I use a round ‘element’ induction cook top). My grill pan is a Le Creuset ribbed pan as the ribbing enables us to generate ‘grill lines’ on the steak. I prefer cast iron because its mass retains heat when the steak goes into it. If the pan loses too much heat, then you are less likely to generate those ‘show-off’ sear lines. I cook one steak per round pan when using the following sear technique. Incidentally, I use a square grill pan when cooking over an open fire as the fire heats all the areas of the pan; I can get two porterhouse steaks at a time into my square grill pan.
Place the steak into the pre-heated hot grill pan. Allow the steak to cook for about three minutes. For very thick steaks, some will use a medium heat under their grill pan and place a lid on the pan for the full three minutes. The surface heat from the hot pan onto the steak induces the Maillard Reaction. The Maillard Reaction is the many small, simultaneous chemical reactions that occur when proteins and sugars in and on your food are transformed by heat on the outside — creating a wonderful coating/crust.
Carefully lift the steak out of the pan and rotate the steak (or pan) ninety degrees. Continue to cook for a further couple of minutes.
While doing this, salt the top of the steak again on the uncooked side. Seasoning your steak generously with salt just before putting it on the grill means that this salt stays on the surface of the meat without dissolving and the meat juices stay within the muscle fibres for a juicy steak. By immediately grilling the steak at a very high temperature, the steak forms an evenly distributed crispy brown crust.
While one side is searing, you may, rub a little additional salt into the as yet uncooked side.
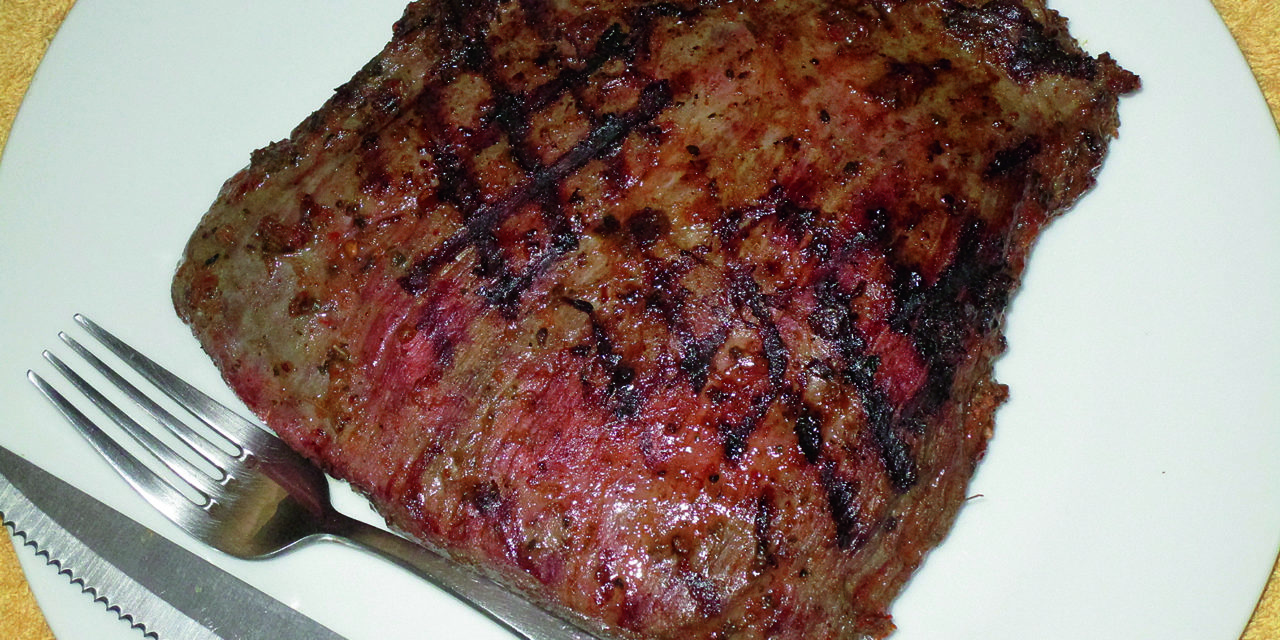
Lift the steak from the pan, you may even turn the pan up to a higher temperature if you used the medium temperature under a lid approach. This is known as the reverse sear method, i.e. the temperature is increased for the second phase of cooking in order to generate more sear and a shorter cooking time. Turn the steak over to sear the other (uncooked) side for a few minutes. You can repeat the ‘cross-hatching’ process to create diamond/square sear marks on this other side too. But note that you won’t see both sides when the steak is presented on a plate. I generally cook this new side with only ‘single’ sear stripes (or even on just a flat hotplate or skillet when I’m working/cooking on a barbecue — such as the type with both a flat plate and an open grid). Look at that magnificent diamond sear pattern created on the cooked side by the 90 rotation in steps 6 and 7. Continue to cook until the steak is done to your liking. Do not flip the steak over again as you are likely to damage the fancy sear marks and the finish will not look as precise.
A large steak with ‘cross-hatched’ (or ‘diamond’) grill marks on a plate.
Straight grill lines on the ‘second’ side. Let the steak rest for a few minutes to allow the juices time to move back into their eating temperature state where they are redistributed through the meat.


